To fix the Duplicate drives problem in Windows 10 file explorer, you simply have to remove a key from the Registry. It is as simple as that. To do this, follow the simple steps given below. 1. Press the Win+X keys simultaneously and select Run from the options. 2. After opening the Run dialog box, type regedit and press Enter. It will prompt you to confirm the action. Click Yes and the Registry Editor will be opened. 3. Now follow this path in registry keys list on the left panel and Navigate to the DelegateFolders key: HKEY_LOCAL_MACHINE\SOFTWARE\Microsoft\Windows\CurrentVersion\Explorer\Desktop\NameSpace\DelegateFolders 4. After navigating to the DelegateFolders key, there will be a sub-key named as {F5FB2C77-0E2F-4A16-A381-3E560C68BC83}
⦁Delete the {F5FB2C77-0E2F-4A16-A381-3E560C68BC83} key by right-clicking it and selecting the Delete option. Once this key is deleted, there won’t be any duplicate drive icons in Windows 10 File Explorer.
Configuring your internet connection to a Metered Connection will require Microsoft to ask for your permission before downloading and installing updates.
Bear in mind that this option will only delay the updates. As soon as you toggle the Metered Connection button to “OFF,” Windows 10 will start downloading updates again automatically.
But as long as the metered connection button is set to “ON,” Windows 10 will never download any update without your permission.
To set your connection as metered, follow these steps:
1. Select Start > PC Settings > Network & Internet > Network Status >
Microsoft Windows 10, frivolous Apps & Services that are constantly running in the background, unless you go into your Privacy Settings to specifically turn them off...
Alarm & Clock
Calendar
Get Office
Groove Music
Maps
Microsoft Edge
Movies & TV
People
Phone
Phone Companion
Photos
Skype Video
Store
Twitter
Weather
Xbox
Even more annoying is when they keep on running even after you've exited the App or application; you then have to manually go into Task Manager to 'End' or 'Kill' the task to stop it guzzling up precious CPU % Open Settings>Privacy>App permissions>Background apps (Background apps is on the left-hand-side menu.)
Under 'Let apps run in the background', Slide the toggle to the left to switch it setting off
In Winamp type Ctrl+P (for Preferences) navigate to > Plug-ins > Input >
double click 'Nullsoft MIDI Player' > Device Tab > select from
the Device: drop-down menu, then select: "DirectMusic / Microsoft Synthesizer (with output)"
DirectMusic / Microsoft Synthesizer (with output) uses software
emulation of MIDI instruments instead of using your sound card's built-in
MIDI support. This effectively allows Winamp's volume control for the
playback of MIDI files instead of altering the system's MIDI volume,
MIDI device volume or the Winamp volume in the Windows mixer
(in Windows 7 anyway - have not tested this in other Windows versions)
Change the 'Device:' to "DirectMusic / Microsoft Synthesizer (with output)":
To configure Winamp to NOT lower the volume when (or after) you play midi files, try changing 'Volume Control:' to none:
Device tab:
After changing the 'Device:' to either your sound card's hardware MIDI synth or to
one of the DirectMusic software synthesizers (requires DirectX 8 or higher), then...
Volume Control:
Default = autodetect
You can change this to None
and then Winamp will never adjust the volume
No "select all" option in Google chrome history for particular items ...
If you’ve looked around, you may have noticed in Google Chrome that it’s easy to delete just one item in history search-results, or to delete absolutely everything in history. But that’s not always practical!
So here's a secret way to delete a portion of your history without blasting all of it – something not documented anywhere:
Click your Chrome menu...the 3-dot or3-line icon near the upper right of your browser. Then click 'History' in the menu that appears - you can also use quick-access hot-key (Ctrl+H)
Click on Menu Configuration
Now you’ll see a list of recent history items in a new tab.
Choose a Group of Items to Delete
To narrow down the items displayed, do a search using the “Search History” box at the top. After you’ve settled on a group of items to delete…
Click the checkbox on the first item
Scroll to the bottom of the page
Press the Shift button on your keyboard and hold it down. While holding it down, click the checkbox on the last item. This is the secret trick! This is in no menu, and is not mentioned anywhere on the screen.
Scroll back to the top of the page, and click “Remove Selected Items”.
If you're on a Windows 8 or Windows 10 Computer, you most likely find that the system, using built-in or bundled software, can automatically recognize and play DVD-RAM discs containing recordings from a TV. On a Windows 7 Computer however, try the follow if you're having trouble getting the system to play your old TV-recorded DVD-RAM discs:
Open Real Player, and click File->Open:
Navigate unto the DVD-RAM disc where there is a DVD_RTAV
folder. Select the VR_MOVIE.VRO file from within this folder and Real player will
recognize and then play this file as a movie.
As an alternative, if you wish, you could copy this VR_MOVIE.VRO file to your hard drive (especially comes in handy for transferring to a computer or laptop that has no DVD-drive or has a faulty DVD-drive) then add an MPEG extension to the file, for example VR_MOVIE.VRO.mpeg, and Real Player will also then recognize and play this file as a movie. No DVD-drive required!
Kickstart your
career with an impressive digital certification. Our free online courses
will guide you through everything from search engines, to social media
and beyond. Keep learning >>
Why get certified?
A certification is a
great way to make your CV shine. It shows you’ve got genuine digital
skills, and that you are motivated to learn: two essential qualities in
today’s business world.
Google have partnered with the Interactive Advertising Bureau to offer a free
certification for those who finish our complete course content. The content covers the basics and beyond, to help you build a great
foundation of digital skills. And you can showcase this qualification on
your CV and LinkedIn profile too.
It’s no secret that two monitors can improve your productivity, but not everyone needs a pair of screens all the time.
If you find yourself in a situation where a second screen could be
beneficial, however, you can easily make your Android device serve
double duty.
How to Enable “Group Policy Editor” (gpedit.msc) in Windows vresions that don't have it - gpedit is a tool to manage MS Windows Active Directory Group Policies, Security, and much much more
You can add the Group Policy Editor to Windows editions that normally don't have it, such as Windows 7 Starter Edition, Home, Home Premium, or even Windows 8.1
For Windows x64 Users:
You must go to the SysWOW64 folder and copy the GroupPolicy, GroupPolicyUsers folder and the gpedit.msc file into the System32 folder.
This very handy Windows add-on was apparently compiled by "davehc" on the Windows 7 forums. He says
in the forum "There is no copyright on it so feel free to use and
distribute!" So feel free to share this - hopefully making it easier for others to find who are in need of it.
How
to clone your old HDD onto a new HDD and get your entire system back up
and running in under an hour; no reinstallation of Windows and all your
applications necessary.
"Why would you want to do this?
Unlike popping in some new memory or adding a peripheral, upgrading a
hard drive has the potential to be a real pain. Rather than go through
the hassle of backing up all your documents and files, pulling your old
disk, popping in a new one, formatting it, and reinstalling your OS
(along with all your programs) and then tweaking everything to get it
back the way it was, you can follow along with us here and have your old
disk cloned, your new disk installed, and your machine up and running
again in (typically) under an hour...." Read more ...
I can confirm & testify that this howtogeek.com claim is absolutely true, as I have just used the procedure to upgrade from a (faulty) 500 GB Seagate HDD to a brand new Seagate 1TB HDD. Swapped the disks after cloning, and then booted back into windows on the new HDD perfectly as normal, like nothing had ever even happened... in less than 1 hour!
Event Viewer Error:
'The server {BF6C1E47-86EC-4194-9CE5-13C15DCB2001} did not register with DCOM within the required timeout.' *
Event Viewer Error:
'The server {1B1F472E-3221-4826-97DB-2C2324D389AE} did not register with DCOM within the required timeout.' **
++++++++++++++++++++++++
* Windows Registry Editor reveals that CLSID
{BF6C1E47-86EC-4194-9CE5-13C15DCB2001} is: "Automatic Maintenance task
to enable SkyDrive file sync to make progress while in Connected
Standby", which has LocalServer32 = 'C:\Windows\System32\skydrive.exe'
** Windows
Registry Editor also reveals that CLSID
{1B1F472E-3221-4826-97DB-2C2324D389AE} is for "SyncEngineCOMServer
Class", which has LocalServer32 = 'C:\Windows\System32\skydrive.exe'
++++++++++++++++++++++++
Consequently, if you keep getting errors like these in your Windows System Logs (in the Event Viewer), then here is a possible suggested fix: (to start Windows Task Scheduler, click Start Menu or use shortcut WindowsKey+R and type: taskschd.msc .... then)
"In the Task Scheduler, once you expand Task Scheduler Library >
Microsoft > Windows, scroll down and click on
SkyDrive, you find two scheduled jobs, "Idle Sync Maintenance Task" and "Routine Maintenance Task". I found that disabling both of these jobs has caused the error message to cease.
I don't think disabling these jobs will be a good solution for
everyone, since there may be useful things that these jobs [are supposed
to] do, but for me, since I have no interest in SkyDrive, disabling
them is fine."
The Component Object Model (COM)
infrastructure tried to start the named server; however, the server did
not reply within the required timeout period. There might be a deadlock,
or the program might not have responded to the server initialization
code within the timeout period of two minutes.
GUID: 1B1F472E-3221-4826-97DB-2C2324D389AE and
BF6C1E47-86EC-4194-9CE5-13C15DCB2001 - these GUIDs have been determined
to be associated with a Microsoft SkyDrive maintenance tasks configured
to
run at 3:00 am in Microsoft Task Scheduler on a Windows 8.1 Pro
workstation. The task says: "Performs OneDrive file sync when the
computer is idle." and it shows a failure with Error code 0x80080005. Most probably this issue occurs when there is no SkyDrive enabled account configured on the computer.
User Action:
If the problem continues to occur, contact the program vendor. To determine the program vendor
Using Regedit, navigate to the following registry value HKEY_CLASSES_ROOT\CLSID\{clsid value}\LocalServer32 The clsid value is the GUID information displayed in the message.
In the right pane, double-click Default.
The Edit String dialog box is displayed. Leave this dialog box open.
Click Start, and then click My Computer.
Using the information displayed in the Value data box of the Edit String dialog box, navigate to the program.
Right-click the program name, and then click Properties. The Properties dialog box for the program is displayed.
To determine who the vendor is for this program, refer to the Version tab.
Additional options:
If you do not need DCOM you can disable it in the following way:
1. Set the EnableDCOM Value Name, a string (REG_SZ) data type, at HKEY_LOCAL_MACHINE\Software\Microsoft\OLE to N.
2.Shutdown and restart your computer.
3.For Windows XP (or WIN 8) & Windows Server 2003, complete the following additional steps:
A. Run Dcomcnfg.exe.
B. Expand Component Services.
C. Right-click Computer and press Properties. For a remote computer, right-click Computer, press New, press Computer, type the ComputerName, right-click the ComputerName and press Properties.
D. Select the Default Properties tab.
E. Clear the Enable Distributed COM on this Computer box.
F. press Apply to disable DCOM.
G. Press OK and exit Dcomcnfg.exe.
H. Shutdown and restart your computer.
This simple Registry tweak will let you re-enable the old classic
Windows 8.1 / 7 type Clock and Calendar in Windows 10.
Open your Registry
Editor, press Win + R, type regedit and hit Enter. (Before editing the Registry, don’t forget to create a backup of your Registry files.)
After opening Registry Editor, navigate to the following key:
Click on the Immersiveshell folder on your left hand side and create a new DWORD (32-bit) Value in your right hand side.
To create a new DWORD Value, right-click on the empty space of your right hand side, select new and click on DWORD (32-bit) Value.
Name it UseWin32TrayClockExperience. By default, the value would be 0. You have to set the value to 1. To change the value, double-click on UseWin32TrayClockExperience and enter 1 before saving your change.
Right after setting up the value to 1, your new Windows 10 Clock and
Calendar will be changed to Windows 7 style Clock and Calendar.
If you need to install or reinstall Windows 10, you can use the tools on this page to create your own installation media using either a USB
flash drive or a DVD.
Before you begin
Make sure you have:
An Internet connection (Internet service provider fees may apply).
Sufficient data storage available on a computer, USB or external drive for the download.
A
blank USB or DVD (and DVD burner) with at least 4 GB of space if you
want to create media. We recommend using a blank USB or blank DVD,
because any content on it will be deleted.
If
you are installing the operating system for the first time, you will
need your Windows product key (xxxxx-xxxxx-xxxxx-xxxxx-xxxxx). For more
information about product keys and when they are required, visit the FAQ page.
Built-in media creation options for USBs and DVDs.
Optional conversion to ISO file format.
*** *** *** *** *** *** *** *** ***
I downloaded the 64-bit version for an in-place upgrade of my Windows 8.1 Desktop PC. All together (download+install) took about 4½ hours. The PC restarts several times during the upgrade although in between the restarts you can carry on using the computer normally while the upgrade is in process. Fairly straightforward. Afterwards most Windows 8.1 programs and applications seemed to be working as normal as before, on Windows 10. The new re-revised Start Menu does takes some getting used to though!
***
NOTE:
If you have Windows 7 or 8.1, you may be expecting to see the Get Windows 10 app, a small Windows icon in your system tray, that gives you the opportunity to get a free copy of Windows 10.
After installing GIMP 2.8, or upgrading from an earlier version of the software, and especially if you've then also installed extensions or plug-ins, such as the gimp-dds 3.0.0 plug-in ̶̶ you may find yourself in the situation whereby everytime you go to load GIMP it gets to the 'loading fonts' routine (right after 'looking for data files') and then hangs up and won't continue any further, every time!
I've learned that some particular fonts are constantly in use or 'locked' by the Adobe Acrobat Update Service.
Try stopping or 'killing' the Adobe Acrobat process (via Administrative Tools Services; or simply using Task Manager - right-click on the Adobe Acrobat Update Service, and select 'End task').
This should release any locked fonts and allow the GIMP loading-up process to finally succeed with loading the fonts database.
Note: Not necessary to stop the Adobe Acrobat service everytime you run GIMP, only just for the intial post-install run, when (or if) it hangs. Apparently, once Gimp's internal fonts-database has been created, it seems to run OK thereafter, even when the Adobe Acrobat service is up and running in the background.
As I am partial to Firefox and got fed up always having to switch to Internet Explorer just to post and to see Facebook emoticons. I decided to investigate, and found the answer on the Facebook help community.
Some users of Firefox on Windows 8.1 have reported having to downgrade to version 29 to get Facebook emoticons back up and visible.
Here's an easier FIX, which works for me: Go to Firefox options, select the Advanced tab and uncheck (remove the check-mark from) "Use hardware acceleration". Don't forget to restart Firefox.
After you install Windows 8.1 (or purchase a new computer with 8.1 and then re-install legacy applications)
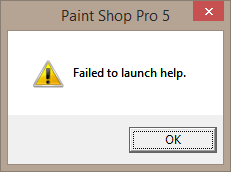
you may find pressing F1 for Help no longers works in a legacy application, and you get a pop-up dialog saying 'Failed to launch Help',
something like this:
Cause: The Help for [some legacy] programs was created in Windows Help format, which depends on a feature that isn't included in Windows 8.1 or Windows RT 8.1.
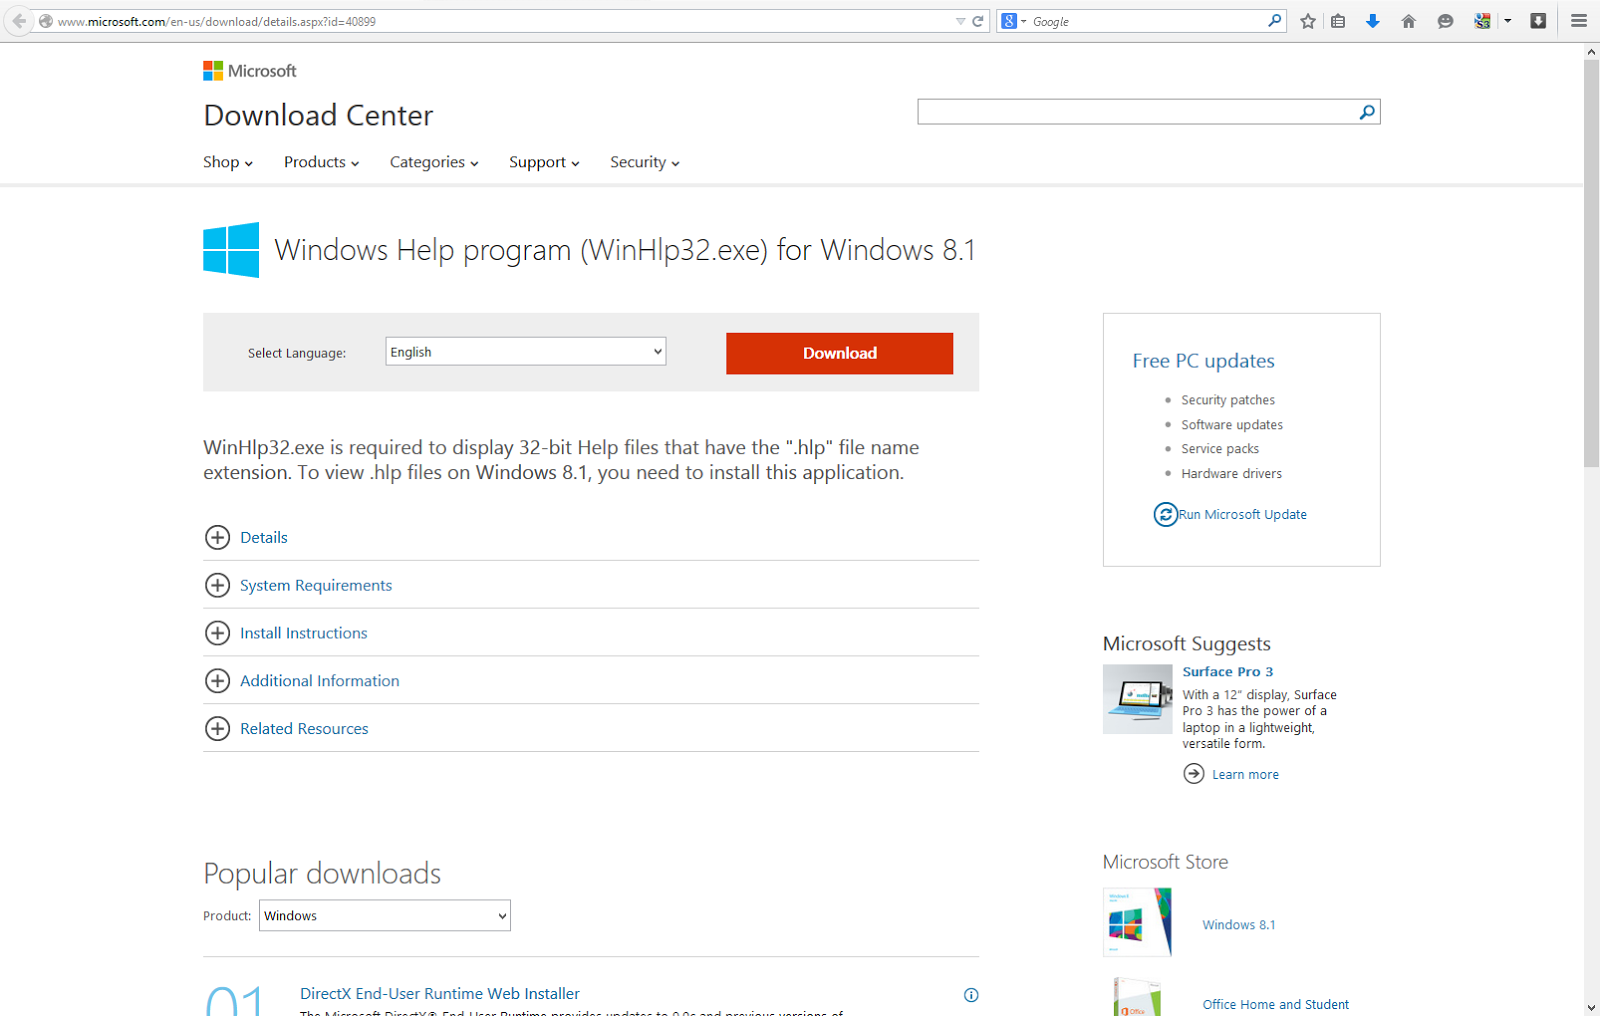
FIX: WinHlp32.exe is required to display 32-bit Help files that have the ".hlp" file name extension. To view .hlp files on Windows 8.1, you need to install 'Windows Help program (WinHlp32.exe) for Windows 8.1 .' availbale from Microsoft's web site.
Trying to 'network' two computers (Laptop & PC) on 'Windows 8.1 with
Bing' on a wireless Network, and you get a cannot access error message dialog that looks something like this:
The cause for me in this instance was because the PCs weren't in the same workgroup.
FIX: Join or create a workgroup as follows:
1. Tap or click to open System.
2. Under Computer name, domain, and workgroup settings, tap or click 'Change settings'. If Administrator permission is required, you might be asked for an admin password or to confirm your choice.
3. In the System Properties dialog box, tap or click the Computer Name tab, and then tap or click 'Change'.
4. In the Computer Name/Domain Changes dialog box, under Member of, tap or click Workgroup, and then do one of the following:
• To join an existing workgroup, enter the name of the workgroup that you want to join, and then tap or click OK.
• To create a new workgroup, enter the name of the workgroup that you want to create, and then tap or click OK.
***
Other possible causes:
# You don't have access permissions for the file or folder you're trying to get to.
FIX: Contact the owner of the file or folder to ask for permission.
If you're on a corporate network, you'll need to contact your network administrator
***
# Password-protected sharing is turned on.
FIX: Password-protected sharing is on by default for PCs in workgroups. When password-protected sharing is turned on, people using other PCs on your network can't get to your shared folders or printers unless they have a user account on your PC. There are two ways to turn on file or printer sharing:
Create identical user accounts on all PCs in the workgroup (recommended). For more info, see Create a user account.
Turn off password-protected sharing. To turn off password-protected sharing, follow these steps:
Tap or click to open Advanced sharing settings.
Click the chevron to expand the current network profile.
Under Password protected sharing, click Turn off password protected sharing, and then click Save changes. You might be asked for an admin password or to confirm your choice.
Note:
Password-protected sharing is unavailable on PCs that are on a domain.
You can only join a domain if your PC is running Windows 8.1 Pro or Windows 8.1 Enterprise.
***
# The Find devices and content slider is turned off.
FIX: To find PCs, devices, and content on your network...
Swipe in from the right edge of the screen, tap Settings, and then tap Change PC settings. (If you're using a mouse, point to the lower-right corner of the screen, move the mouse pointer up, click Settings, and then click Change PC settings.)
Tap or click Network, and then turn on the Find devices and content slider.



 to expand the current network profile.

